
February 02, 2017 ( last updated : February 03, 2017 )
spring-boot
quickstart
rest
json
microservice
cloudnative
development
https://github.com/alainpham/rest-service
In this post you will learn how to create a RESTful microservice from scratch using Spring-Boot, Eclipse & Maven.
Spring boot is one of the very popular frameworks to build microservices. In fact it has been chosen to be the standard for JBoss Fuse (Fuse Integration Services 2.0) deployments on Openshift. It can also be used for general java application purposes. You would be surprised how easy it is to create standalone packages that are capable of running production grade services.
Source code for this can be found here : https://github.com/alainpham/rest-service
These are the steps of this tutorial
As a prerequisite for this tutorial you will need the following elements:
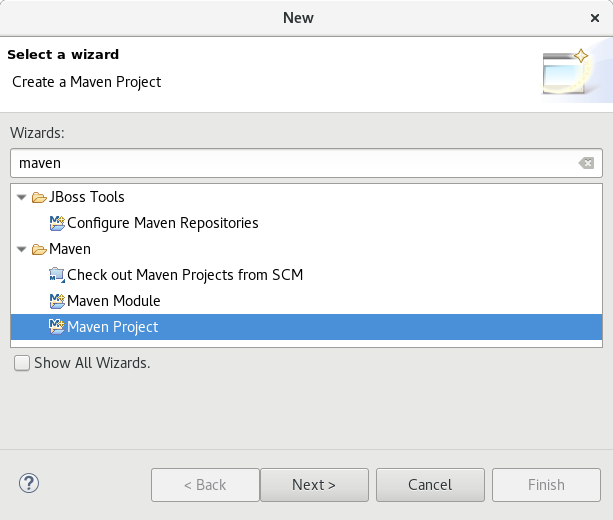
First you must create a simple maven project. For that you can use the Eclipse Wizard

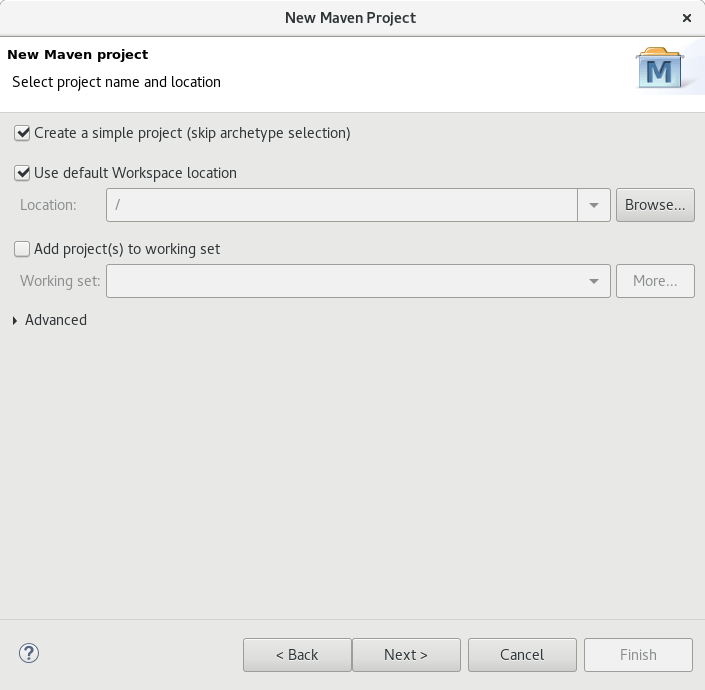
Chose simple project to have an empty pom.xml file

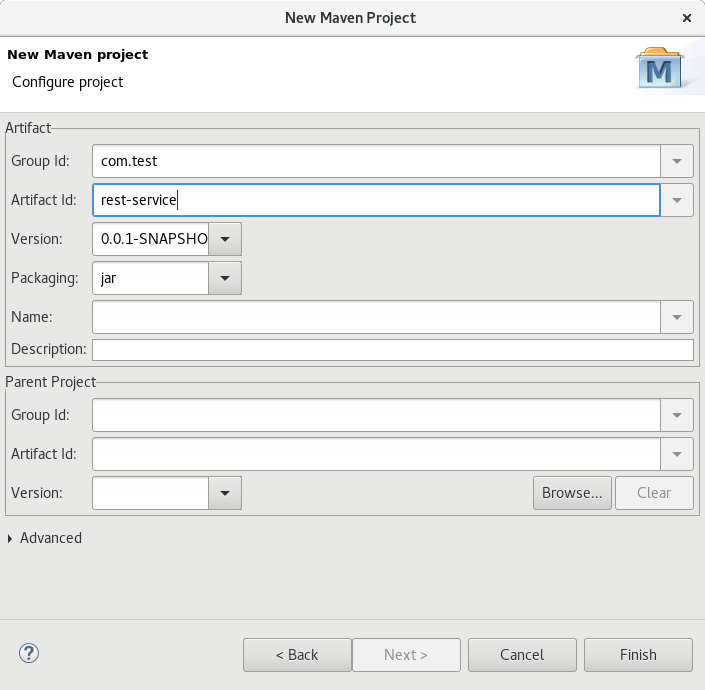
Fill in the project details

Add these parent, dependencies, and plugin blocs to your pom
<project xmlns="http://maven.apache.org/POM/4.0.0" xmlns:xsi="http://www.w3.org/2001/XMLSchema-instance"
	xsi:schemaLocation="http://maven.apache.org/POM/4.0.0 http://maven.apache.org/xsd/maven-4.0.0.xsd">
	<modelVersion>4.0.0</modelVersion>
	<groupId>com.test</groupId>
	<artifactId>rest-service</artifactId>
	<version>0.0.1-SNAPSHOT</version>

	<parent>
		<groupId>org.springframework.boot</groupId>
		<artifactId>spring-boot-starter-parent</artifactId>
		<version>1.5.1.RELEASE</version>
	</parent>

	<dependencies>
		<dependency>
			<groupId>org.springframework.boot</groupId>
			<artifactId>spring-boot-starter-web</artifactId>
		</dependency>

		<dependency>
			<groupId>org.springframework.boot</groupId>
			<artifactId>spring-boot-starter-test</artifactId>
			<scope>test</scope>
		</dependency>
	</dependencies>

	<build>
		<plugins>
			<plugin>
				<groupId>org.springframework.boot</groupId>
				<artifactId>spring-boot-maven-plugin</artifactId>
			</plugin>
		</plugins>
	</build>
</project>package com.app;
import org.springframework.boot.SpringApplication;
import org.springframework.boot.autoconfigure.EnableAutoConfiguration;
import org.springframework.boot.autoconfigure.SpringBootApplication;
import org.springframework.context.annotation.ComponentScan;
import org.springframework.context.annotation.Configuration;
@SpringBootApplication
public class Application {
public static void main(String[] args) {
SpringApplication.run(Application.class, args);
}
}package com.app.model;
public class Person {
private Long id;
private String name;
public Long getId() {
return id;
}
public void setId(Long id) {
this.id = id;
}
public String getName() {
return name;
}
public void setName(String name) {
this.name = name;
}
}package com.app.service;
import java.util.HashMap;
import java.util.Map;
import org.springframework.web.bind.annotation.*;
import com.app.model.Person;
@RestController
@RequestMapping(value="/svc/person")
public class PersonService {
Map<Long, Person> personMap;
public PersonService() {
super();
personMap = new HashMap< Long, Person>();
Person p1 = new Person();
p1.setId(1l);
p1.setName("John Doe");
Person p2 = new Person();
p2.setId(2l);
p2.setName("Jane Smith");
personMap.put(p1.getId(), p1);
personMap.put(p2.getId(), p2);
}
@RequestMapping(value="/{id}",method = RequestMethod.GET)
public Person getPerson(@PathVariable Long id){
return personMap.get(id);
}
}Open a command prompt in the root folder of your project and run :
mvn spring-boot:runYou can now also build your package and run the flat jar file
mvn package
java -jar target/rest-service-0.0.1-SNAPSHOT.jar
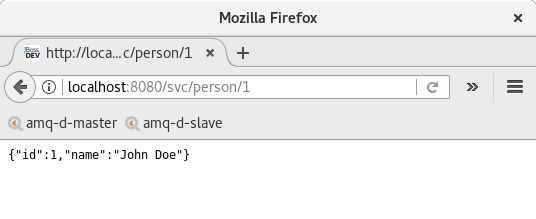
Now open your browser and consume your microservice by entering the following url
http://localhost:8080/svc/person/1
The next post will be about how to deploy such microservices packaged in Docker containers on Openshift
Thanks for reading !
Originally published February 02, 2017
Latest update February 03, 2017
Related posts :